


Discover how to effectively utilize permission sets in HubSpot to streamline user setup and manage access to essential tools and resources.
Understanding the Role of Permission Sets in HubSpot
Permission sets in HubSpot play a crucial role in granting and restricting access to various features and resources within the platform. They allow administrators to define specific permissions for different user roles, ensuring that each team member has access to the tools they need to perform their tasks efficiently.
By utilizing permission sets, administrators can save time when setting up new users. Instead of manually configuring access for each individual, they can simply assign the appropriate permission set based on the user's role. This not only streamlines the onboarding process but also ensures that users have the necessary access from day one.
Additionally, permission sets enable administrators to control access to sensitive data and features. By granting or restricting permissions, administrators can ensure that users only have access to the resources relevant to their roles and responsibilities. This helps maintain data integrity and security within the HubSpot platform.
Understanding the role of permission sets is essential for efficient user management and access control in HubSpot. Let's dive deeper into how to set up permission sets for different user roles.
------------------------------------------
Follow These Steps
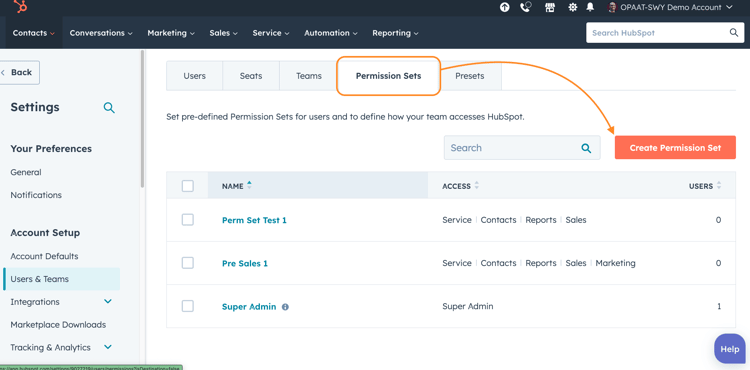
Step 1: Accessing Permission Sets
- Log in to your HubSpot account.
- Go to settings
- The go-to users and teams
Step 2: Choosing a Method for Creating Permission Sets
- Click Create Permission set.
- Decide whether you want to create a permission set from scratch or use a pre-existing template provided by HubSpot.
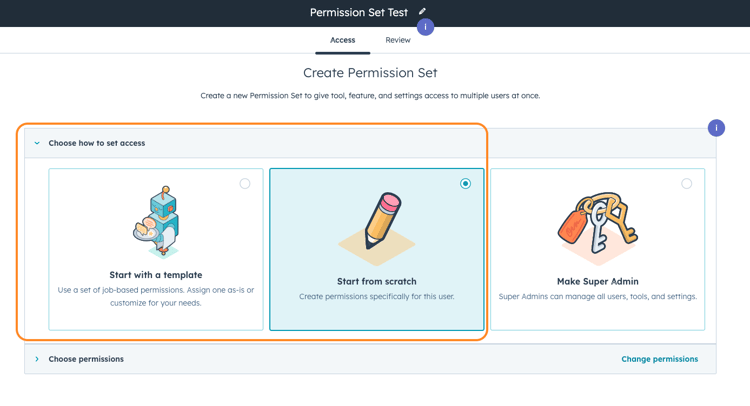
- If using a template, go to the templates section and select an appropriate template (e.g., 'Service Manager' or 'Service Rep') as a starting point.
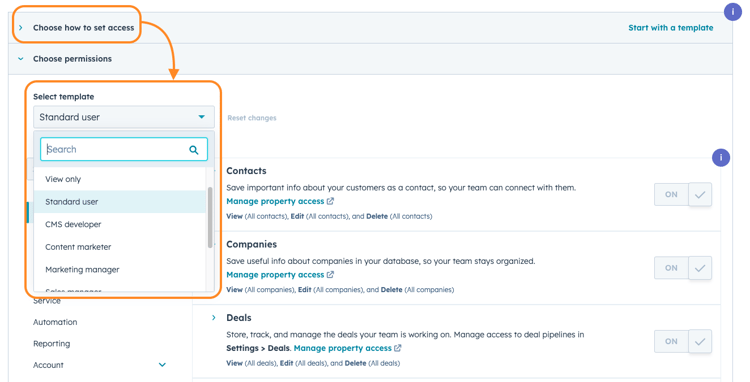
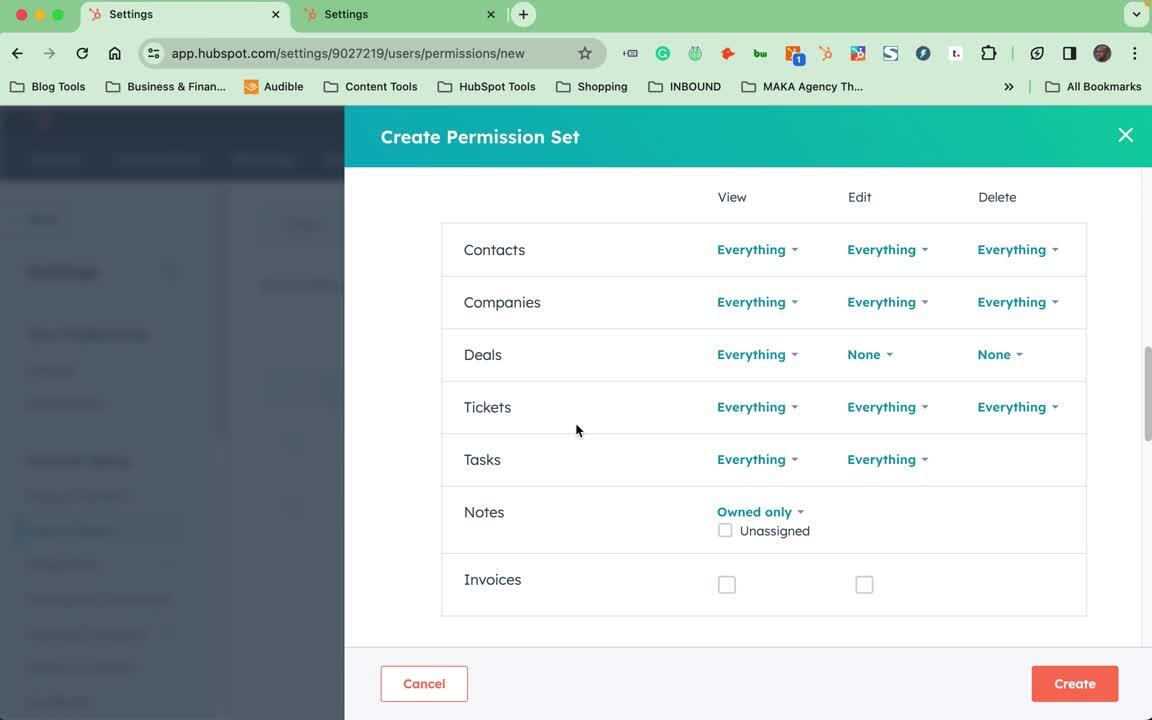
Step 3: Customizing Permission Sets
- You can customise the permissions, whether starting from a template or from scratch.
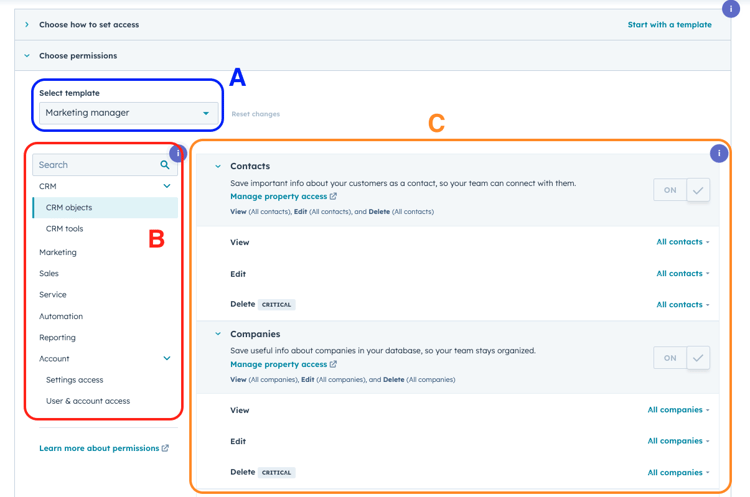
- Go through each section (like contacts, sales, service, etc.) and adjust the permissions according to the needs of the role. For instance, you may want to restrict a service rep from editing or deleting contacts by setting these options to 'None'.
Step 4: Reviewing and Adjusting Permissions
- Carefully review each permission to ensure it aligns with the role and responsibilities of the user group.
- You can manually adjust individual permissions, adding or removing access as needed, even when using a template.
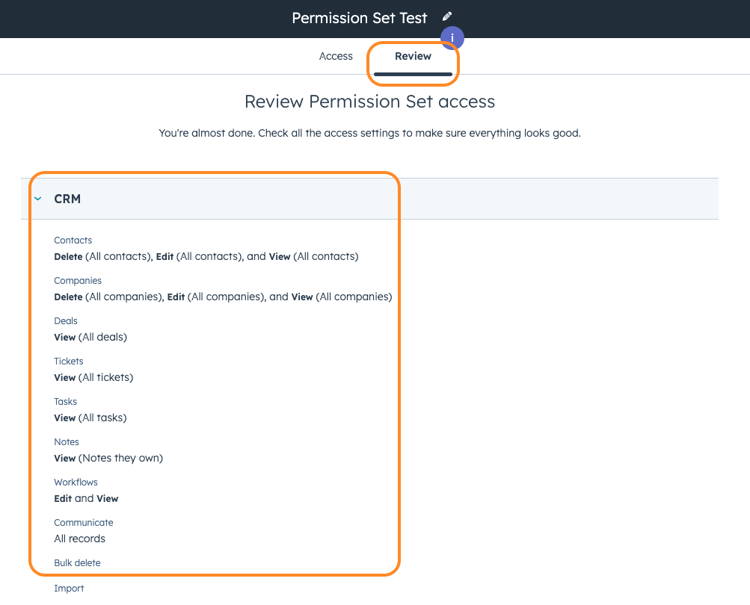
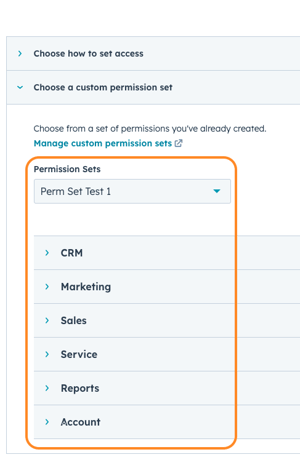
Step 5: Naming and Saving the Permission Set
- Once you are satisfied with the configuration, give the permission set a descriptive name (e.g., 'Permission Set Test 1').
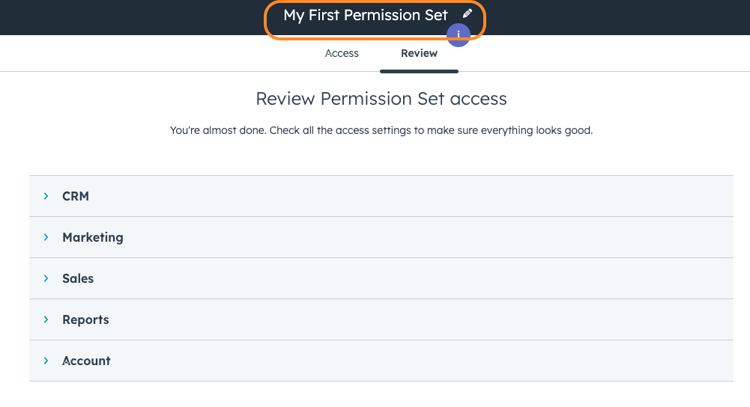
- Save the newly created permission set.
Step 6: Applying Permission Sets to New Users
- Create your users.
- Assign the permission set to the new users.

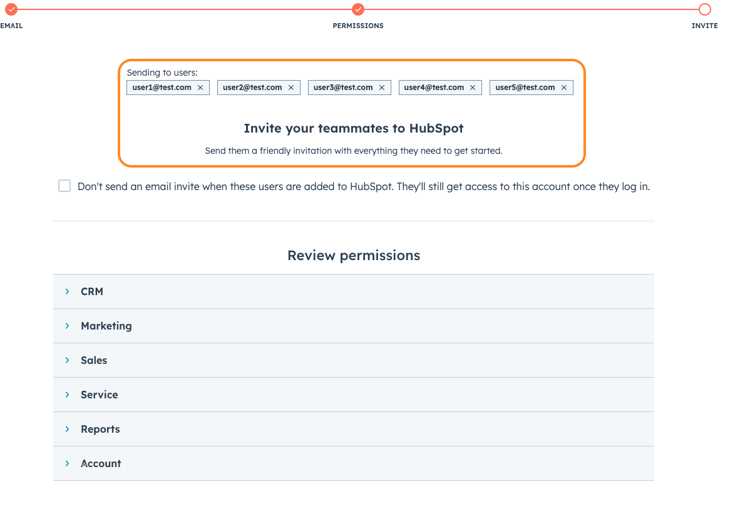
Step 7: Sending Invitations with Permission Sets
- After assigning permission sets to new users, proceed to send them invitations.
- These invitations will include the permissions set, allowing new users to have immediate and appropriate access upon joining your HubSpot portal.
--------------------------------------------------
Best Practices for Managing Permission Sets in HubSpot
Effectively managing permission sets in HubSpot is crucial for maintaining data security and ensuring users can perform their tasks.
- First and foremost, regularly review and update permission sets as organizational roles and responsibilities evolve. As new teams and roles are created, it is important to ensure that the corresponding permission sets are created and assigned appropriately. Likewise, if a role's responsibilities change, update the corresponding permission set to reflect the new access requirements.
- Additionally, it is recommended to audit user access and permissions regularly. This helps identify any discrepancies or unauthorized access within the organization. HubSpot provides robust reporting and auditing features that allow administrators to track user activities and permissions.
- Another best practice is to document each permission set's purpose and access requirements. This documentation can serve as a reference for administrators and new users, ensuring that the appropriate permission set is assigned during user setup.
- Lastly, provide training and resources for administrators and new users to utilize permission sets in HubSpot effectively. Educate administrators on creating, managing, and assigning permission sets, and train new users to navigate the platform based on their assigned permission set.
By following these best practices, administrators can ensure that permission sets in HubSpot are effectively managed and utilized to streamline user setup and control access to essential tools and resources.
--------------------------------------------------
Conclusion
Creating and applying permission sets in HubSpot streamlines managing user access, enhancing security and efficiency. By following these steps, you can ensure that each team member has the necessary permissions to perform their role effectively while safeguarding sensitive data and functionalities.
Was This Helpful? Subscribe below for more HubSpot Tips.

COMMENTS